Making Bone Broth
We started making bone broth about 7 or 8 years ago when I read about it’s tremendous benefits for health. When talking to my family, bone broth is nothing new. This is the way my grandmother made her broth to be thrifty and low waste and how many great grand parents made broth before the convenience of bouillon cubes and cartons of broth were available. This is not only nouishing but an economical way of using all of what you buy.
Homemade bone broth is different than most broths bought in stores because it is simmered for a long time and doesn’t contain extra additives. When simmering a broth for a long while it extracts the contents- the collagen, amino acids, and minerals that are nourishing to our digestive systems.
I drink it on its own as a mug of broth in th late mornings, expeically throughout winter to keep my immune system humming along and also use it in soups, stews, when sautéing vegetables and anywhere else you want to add a pinch of flavor and nutrient density.
To be honest, we hardly use a recipe for bone broth. We use the bones we have kept and frozen from meals or bones that we have purchased from farms or the farmer’s market. To make this even lower waste cooking, when I use greens like kale in a recipe, I freeze the stems in a bag that I later use for broth. So, I always have a bag in the freezer saving broth ingredients.
I estimate that we use around 2 pounds of bones total. Quality matters. I recommend to only use the leftover bones of healthy well-raised pastured animals. Toxicity in animals accumulates in the bones so if animals are exposed to heavy metals or other toxins it is more likely to end up in the bones and then ultimately in your broth. So I suggest being choosy with your meat and bone sourcing, looking for organic, pasture finished beef and organic poultry.
You can add other flavors like jalapeño if you like spice or toss in some turmeric to up the anti-inflammatory benefits. There are lots of ways to get creative with this. You can start with the basic recipe or upgrade it to your taste. You can also add flavor to each individual cup with a bit of lemon or red pepper flakes.
Simple Bone Broth Recipe
Serves 6-8
Total time: Pressure cooker 2 hours, slow cooker 24 +
Ingredients:
- 2 pounds of bones (approx.)
- 2 carrots, halved
- 2 celery stalks, halved
- 1 onion, quartered
- 2 cloves of garlic, smashed
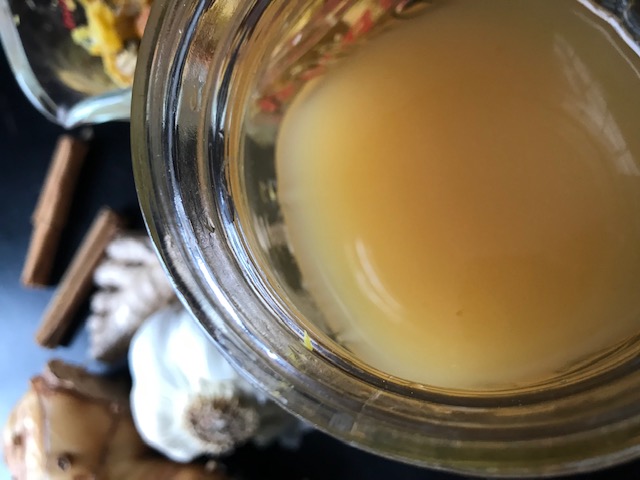
- 1 inch ginger root (optional)
- A generous pinch (or two) of Sea salt
- 2 bay leaves
- Scraps of veggies- stems from kale or other greens, onion peels, aromatics if desired (optional)
Instructions:
This takes about 2 hours in the pressure cooker (high pressure) or 24 hours on the stove or slow cooker.
Slow cooker: Place all the ingredients in the slow cooker except the apple cider vinegar. You will be adding that the last 30 minutes but if you think you might not remember you can add it in the beginning.
Add enough water to cover everything thoroughly. Cook on low for 24 hours or so. The liquid will shrink significantly. I usually add more water about half way through to extend the broth.
Add apple cider vinegar if you haven’t already and cook for 30 more minutes. The ACV helps extract more minerals from the bones.
Take off of the heat and strain using a fine mesh strainer. When it cools a bit, transfer to mason jars and store in the fridge for up to five days.
Pressure cooker: Place all the ingredients in the pressure cooker. Add enough water to cover everything thoroughly.
Cook on high for 2 hours.
When it cools a bit, add to mason jars and store in the fridge for up to five days. You may notice that your broth turns rather gelatinous after being cooled. This is a good thing. It is said the more gelatinous it is, the more collagen you are getting out of your broth. Also, you may notice that the fat floats to the top as well. You can skim off the fat before heating the broth and use the fat in other cooking if you would like, heat it in the broth or discard it.
Note: You can also freeze this. I like to pour it into an ice cube tray to freeze it in small batches so I can pop one in a sauce or adda few for a quick mug of broth. I also freeze it in a mason jar and defrost in the fridge when I’m ready for it.
Enjoy!
-LN